The Library window
The fixture library window is used to have a look at or update the details of the fixture definitions in the fixture library.
The fixtures in the library are organized in fixture categories. A category can contain all fixtures from a given manufacturer or otherwise group fixtures that belong together.
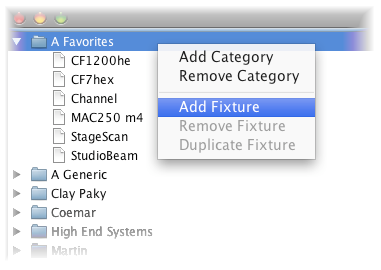
The categories are shown in the tree structure on the left side of the window. You use the context menu to add or remove categories, or to add new fixtures to a selected category.

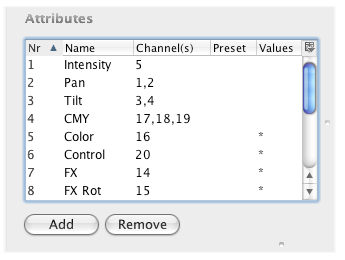
After selecting a fixture, the attributes of that fixture are shown on the right side of the window. When adding new attributes, you should try to follow the same naming conventions as used for the already existing fixtures. When controlling fixtures it is possible to change attribute values for multiple fixtures at the same time, even for fixtures of different types, provided that the attribute names are the same in the different fixture definitions. It is therefor important that attributes with the same function get the same name in all fixture definitions.
These are the names that are used for some of the most common attributes in the library:
| Intensity |
| Pan |
| Tilt |
| RGB |
| CMY |
| Gobo |
| Gobo2 |
You specify the DMX channel numbers in the "Channel(s)" column. These channel numbers are relative to the start address that will be assigned to the fixture when adding fixtures to a show in the Show Fixtures window.

When attributes use more than one DMX channel, you list all channel numbers separated by a comma. This can be used for example for high resolution Pan and Tilt attributes that require two DMX channels, or for CMY or RGB color attributes that require three DMX channels.
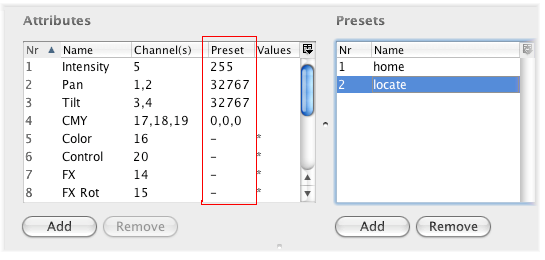
You can add presets by adding rows in the table on the right. Example presets are "home", which moves the fixture in the home position with the lamp off, and "locate" which is used to see where the fixture is (lamp on).

When the preset is selected in the Preset table, the column "Preset" in the Attributes table contains the values for the different attributes for that preset. A dash ("-") indicates that the value should not change for this preset. The preset value for attributes that span more than one DMX channel can be expressed either in one figure (see Pan and Tilt in the above example), or in values between 0 and 255 per DMX channel separated by a comma (see the CMY attribute in the above example). The center value for the Pan attribute could be specified as "32767" or as "128,128".
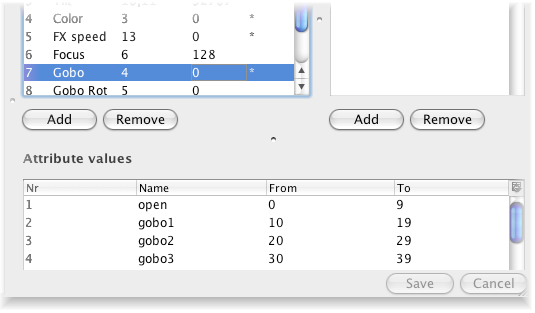
The bottom table on the right side is used for assigning names to attribute value ranges. If any such values are defined, this is indicated with a star in the "Values" column in the attributes table.

The fixture details are stored on your computer in the folder called 'library' which is located in the same folder as the Lassi program itself. The 'library' folder has a sub-folder called 'fixtures'. The 'fixtures' folder has a sub-folder for each of the fixture categories. Within the category folders, there is a sub-folder for each fixture in that category.
The fixture folder contains a file called fixture.xml with the details about that fixture definition.
Note: the idea is that at a later stage the fixture folder can also contain images (for example representing gobos that are present in the fixture).
To make a backup copy of your entire fixture library before you start making any changes to it, you can copy the complete fixtures folder to another location on your computer. If you later on want to restore the definition of a single fixture, you can copy the folder for that fixture back to its original position.
Similarly you can create a new fixture definition starting from existing fixture definition by copying the folder of the existing fixture to a new folder with a different name. This can be in the same category folder or a different one.
If you are brave enough you could also make changes to the fixtures.xml file directly, but we would recommend to always use the Fixture Library window for this.
